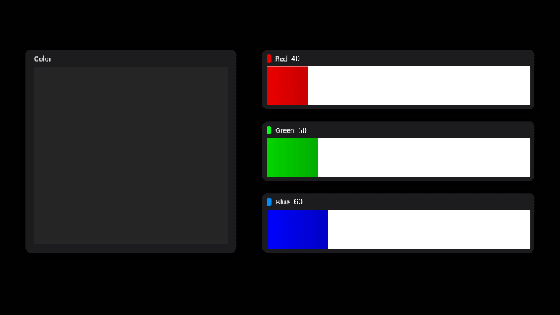
How Does the Project Work?
The display presents three sliders that individually adjust the Red (R), Green (G), and Blue (B) color values of an RGB LED connected to an Arduino. Users control the colors by sliding the sliders, and the changes are transmitted to the Arduino via serial communication. The display also shows the hexadecimal value of the adjusted color in real-time using a Text View component, while the Arduino sends the updated color value back to the display.
Summary of Features:
- Sliders: Precise adjustment of each color channel intensity, ranging from 0 to 255.
- Hexadecimal Display: Color value updated in real-time in the format
#RRGGBB for enhanced technical clarity. - Efficient Communication: The Lumen Protocol library ensures seamless data exchange between the display and Arduino, providing fast and reliable responses.
Components and Materials Used
Hardware:
- Arduino UNO
- Smart Display
- RGB LED
- 220Ω Resistors
- Jumper Wires for connections
Software:
- UnicView Studio: To design the graphical interface.
- Arduino IDE: To program the Arduino.
How to Set Up the Project?
- Download the Project Files:
The source code and schematic are available in the official GitHub repository. - Set Up the Display:
Transfer the project file to the display using UnicView Studio. - Set Up the Arduino:
Open the code in the Arduino IDE, configure the serial port, and upload the code to the Arduino UNO. - Assemble the Circuit:
Connect the display and other components to the Arduino, following the schematic available in the repository.
Why Use This Project?
This demonstration is an excellent way to learn or teach the concepts of hardware control and serial communication with our displays. The project is easy to set up and uses basic tools from UnicView Studio, making it a great hands-on introduction to using these products.
